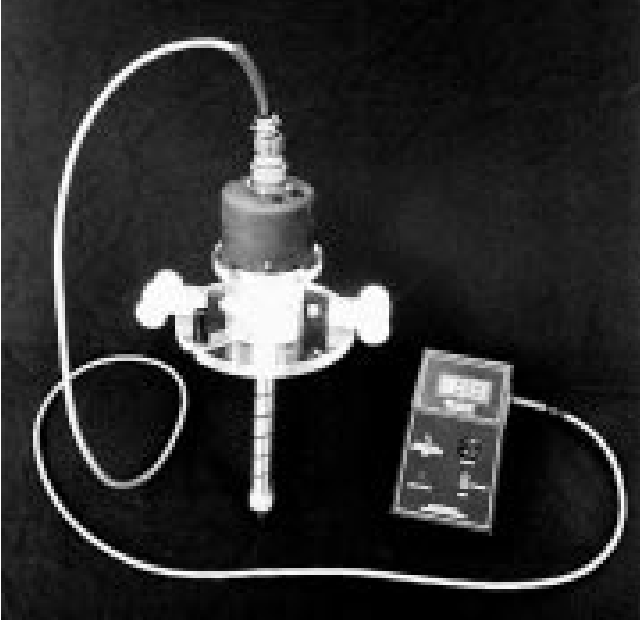
Series 600 ADT Helps to Detect Stress
Our Series 600 ADTs offer high precision angular feedback – similar in performance to an absolute rotary encoder, but for considerably less cost. This advantage was discovered by a leading maker of quality control instruments. They have incorporated the Model 0603-0000-S-010302 (±60°, Lin. ±0.10%) into a newer version of their Spiral Contractometer, a device used to measure excessive plating stress that can cause blistering, distortion, and accelerated corrosion of base metal.
The “S” configuration being used is the -010302: the “1” indicates an operating temperature range of +32 to +167°F, the “3” calls for max. angular velocity of 18,000°/sec. with a lower starting torque of 0.5 gm. cm. (vs. the standard 5.0) and the “2” includes our splashproof option.
The most widely accepted method for measuring plating stress is by observing the angular deflection of a helix that has been plated on the outer surface. This is easily accomplished with the Electronic Spiral Contractometer. The helical sensor, shown in the photo pointing down from under the device, is submerged in a 4-liter sample of plating bath and is connected to a power supply so that it becomes the cathode. Approximately 0.0005” of metal (usually nickel) is then deposited on the outside of the helix. The inside is masked by a thin coating of flexible material.
If the deposit develops with tensile stress, the helix will contract as the system tries to relieve the stress. Conversely, if the stress is compressive, the helix will expand. In either case, one end of the helix will rotate with respect to the other end and this angular motion is precisely detected by the ADT (shown in the photo at the top of the device). The amount of rotation is proportional to the amount of stress. The ADT signal is fed into an LCD meter display. The lower starting torque was of particular interest to minimize friction and backlash of the rotating helix.
By using our Model 0603 ADT, this equipment manufacturer was able to offer their customers the Electronic Spiral Contractometer with a specified accuracy of 0.1°, an LCD display and the elimination of operator error in reading displacement – all vast improvements over their all-mechanical version.
